Intro to Physical Computing – Lab 2
For lab 2, I wanted to try on a new component I discovered in my package. The smallest one: a light sensor. My goal was to apply creativity, resourcefulness and basic arduino literacy into a device that might become handy. My own home-made micro night-light!
Analog test

First, I connected an analog circuit to make sure all the components work. They do! As you can see, covering the sensor increases the resistance and dims the LED light subtly.
This result is absolutely useless: I need my LED shining when the room gets darker, not when it’s well lit. That’s why it’s good I’ve just learned in class how to program digital circuits.
The goal of my first digital circuit attempt, is to use the light sensor to automatically light up the night-light when it gets dark.
First digital circuit

First thing first. Building my first digital circuit following the instructions from class resulted a wonderful LED blinking.
This is the basic code:

The light sensor in this circuit is still redundant. The next step, was to define the light sensor as an input and translate it into a digital output I can use to control the LED.
Light Sensor as an Input
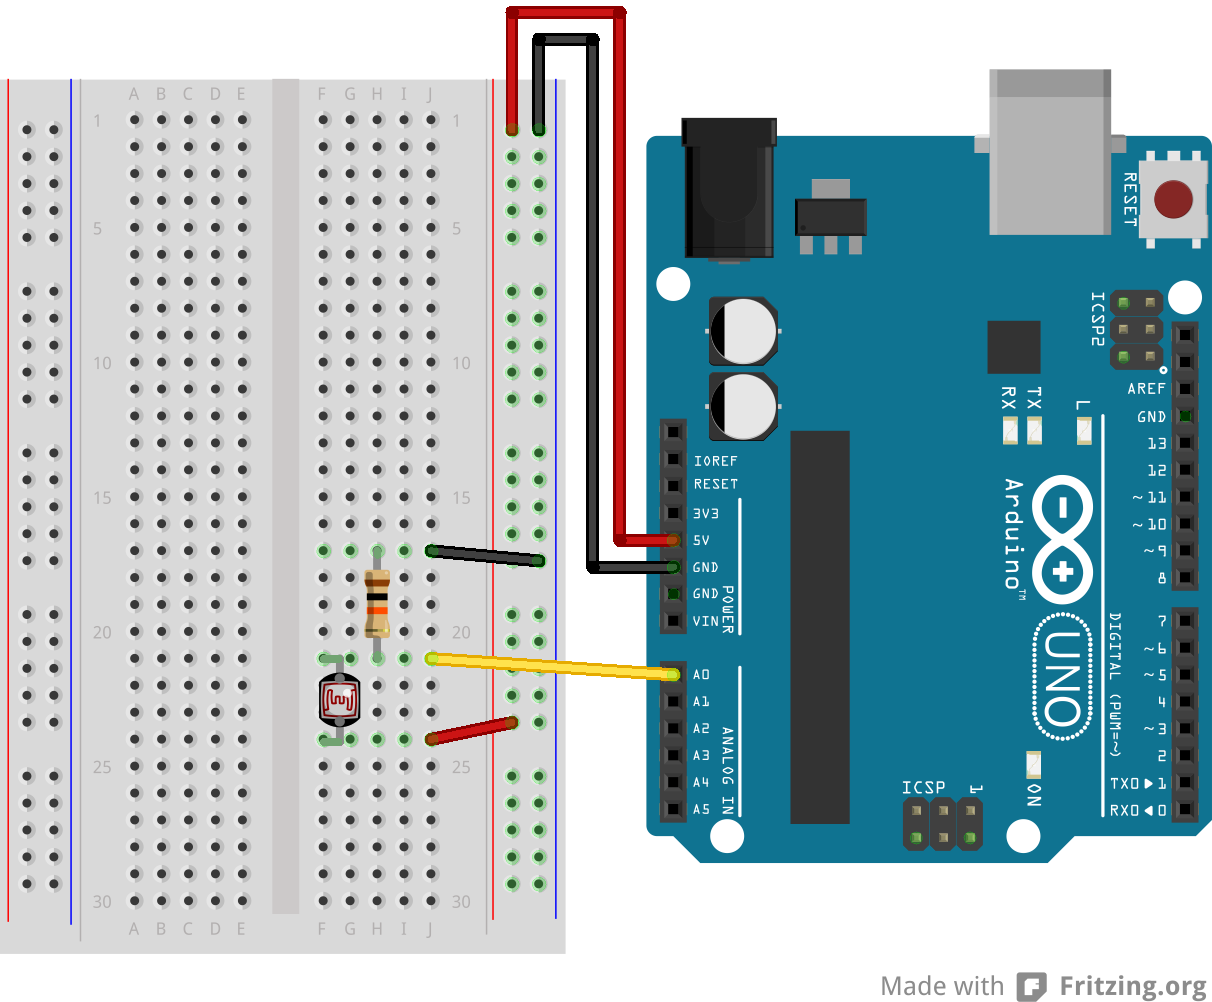
Following this article, I was able to connect the light sensor in a manner that would provide a usable input. A tricky resistor divider was necessary, since the light sensor do not draw almost any current.

Adding the input to the code allowed the light sensor control the LED blinking rate.

This was the code:

Micro Night-Light
What I want to achieve, is the LED turning on automatically when it’s dark. So I opened the serial monitor and found out the values our light sensor receive vary from ~110 when the light sensor is covered and ~350 when it’s exposed to light.

By changing the code and adjusting the threshold to 250, I was able to reach the result I wanted: a night-light which turns on automatically when it’s dark!

The design is still lacking, but the functionality is of a reasonable, helpful gadget.
Hurray!
This was the code I used:

What’s next? Possibly a moisture sensor bringing my flower pot to life with an audio-visual heartbeat. We’ll see if I’m able to wrap my head around that – after learning to solder.

